LocalGPT is a free tool that helps you talk privately with your documents. It keeps your information safe on your computer, so you can feel confident when working with your files.
Technically, LocalGPT offers an API that allows you to create applications using Retrieval-Augmented Generation (RAG). Seamlessly integrate LocalGPT into your applications and workflows to elevate the way you interact with documents. LocalGPT works on different systems right from the start, so you can talk to your data using CUDA for GPU, CPU, or MPS (Metal Performance Shaders). Choose the platform that fits your computer setup best.
In terms of document inference, LocalGPT has practical applications in:
1. Document Summarization:
– LocalGPT can analyze and summarize lengthy documents, providing concise and coherent summaries. This is valuable for quickly extracting key information from reports, articles, or research papers.
2. Information Retrieval:
– Users can engage in conversations with LocalGPT to retrieve specific information from documents. It can answer questions, provide insights, and guide users through the content of the documents.
3. Contextual Understanding:
– LocalGPT excels in understanding the context within documents. It can maintain context over a series of queries, making it useful for users who want to explore or discuss topics within the document.
4. Language Translation Assistance:
– LocalGPT can assist in translating content within documents, helping users understand or communicate information in different languages.
5. Data Exploration:
– For datasets stored in document form, LocalGPT can be used to explore and analyze the data. Users can ask questions about the data, seek patterns, or request specific insights.
6. Document-Based Queries:
– Users can pose queries related to the content of documents, and LocalGPT can provide relevant information or guide users to the sections of the document that address their queries.
7. Research Support:
– Researchers can leverage LocalGPT for assistance in navigating through research papers, exploring related work, and obtaining contextually relevant information for their studies.
8. Document-Based Conversations:
– Users can engage in natural language conversations with LocalGPT about the content of documents, enabling a dynamic interaction that goes beyond simple keyword searches.
9. Document Tagging and Categorization:
– LocalGPT can assist in tagging or categorizing documents based on their content, making it easier for users to organize and manage large sets of documents.
10. Content Extraction:
– LocalGPT can be used to extract specific details or data points from documents, streamlining the process of information extraction for various purposes.
These applications showcase how LocalGPT can enhance document inference tasks by providing natural language interaction and understanding within the context of the documents.
Setting Up Environment for LocalGPT
Step 1: Clone the Repository
The first step is to clone the LocalGPT repository using Git. Open your terminal and run the following command:
git clone https://github.com/PromtEngineer/localGPT.gitThis will download the LocalGPT codebase to your machine.
Step 2: Install Conda for Virtual Environment Management
Conda is a powerful package manager and environment manager for various programming languages, including Python. We will use it to create a virtual environment for LocalGPT. Run the following commands in your terminal:
conda create -n localGPT python=3.10.0
conda activate localGPT
This creates a new virtual environment named “localGPT” and activates it.
Note: If your are new to Conda environment, please refer our video :
Step 3: Install Dependencies using Pip
Now, let’s install the dependencies required to run LocalGPT. Navigate to the LocalGPT directory and run:
pip install -r requirements.txtThis command installs all the necessary Python packages specified in the requirements.txt file.
Step 4: Installing LLAMA-CPP
LocalGPT utilizes LLAMA-CPP for GGML and GGUF models. Ensure you have the correct versions for compatibility.
# METAL GPU Setup for MAC models M1, M2, and M3
CMAKE_ARGS="-DLLAMA_METAL=on" FORCE_CMAKE=1 pip install llama-cpp-python==0.1.83 --no-cache-dir
This installs the specific version of LLAMA-CPP required by LocalGPT, with additional configurations for Apple Metal support.
Ingesting Your OWN Data 📂
Congratulations on successfully setting up your LocalGPT environment! Now, let’s take it a step further by ingesting your own data, enabling you to interact with your documents using LocalGPT. Follow these additional steps to unlock the full potential of this powerful tool.
Step 5: Ingesting Your Data
Place your files in the SOURCE_DOCUMENTS folder. Feel free to organize your data into multiple files within SOURCE_DOCUMENTS. The LocalGPT code will recursively read all your files.
Now, run the following command to ingest all your data. If you are using Apple Silicon (M1/M2/M3), use the specified device type:
python ingest.py --device_type mpsNote: The first time you run this, it requires internet access to download the embedding model (default: Instructor Embedding). Subsequent runs do not require internet access, ensuring that your data stays within your local environment.
Step 6: Chatting with Your Documents
To interact with your ingested documents, execute the following command. You can also specify the device type, just like in ingest.py:
python run_localGPT.py --device_type mpsNote: Similar to the ingestion step, the first run requires an internet connection to download the LLM (default: TheBloke/Llama-2-7b-Chat-GGUF). After the initial download, you can disconnect from the internet, and the script will still work. No data leaves your local environment.
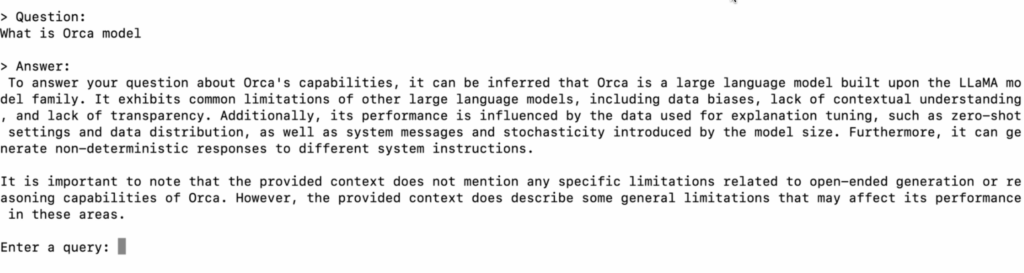
This command loads the ingested vector store and embedding model. You’ll be prompted with:
> Enter a query:Type your question and hit enter. LocalGPT will take some time based on your hardware. Once the answer is generated, you can ask additional questions without re-running the script—just wait for the prompt again.
And there you have it! Your LocalGPT is now customized with your own data, ready to answer your questions and assist you locally. Enjoy exploring the depths of your ingested documents with the power of LocalGPT. Happy querying!
Taking it Further: Running the Graphical User Interface (Optional) 🖥️
If you’re eager to elevate your LocalGPT experience with a graphical interface, you’re in for a treat! Follow these steps to set up and run the graphical user interface (GUI) for LocalGPT.
Step 7: Configure the Model in constants.py (Optional)
Open the constants.py file in an editor of your choice. Depending on your preference, you can specify the LLM (Local Language Model) you want to use. By default, the following model is used:
MODEL_ID = "TheBloke/Llama-2-7b-Chat-GGUF"
MODEL_BASENAME = "llama-2-7b-chat.Q4_K_M.gguf"
Feel free to replace these values with the desired LLM details. Save the file after making any changes.
Step 8: Run the LocalGPT API
- Open a terminal and activate the Python environment containing the dependencies installed from
requirements.txt. - Navigate to the
/LOCALGPTdirectory. - Run the following command:
python run_localGPT_API.py - Wait until everything has loaded.
Step 9: Launch the LocalGPT GUI
- Open a second terminal and activate the same Python environment.
- Navigate to the
/LOCALGPT/localGPTUIdirectory. - Run the following command:
python localGPTUI.py - Open a web browser and go to the address
http://localhost:5111/
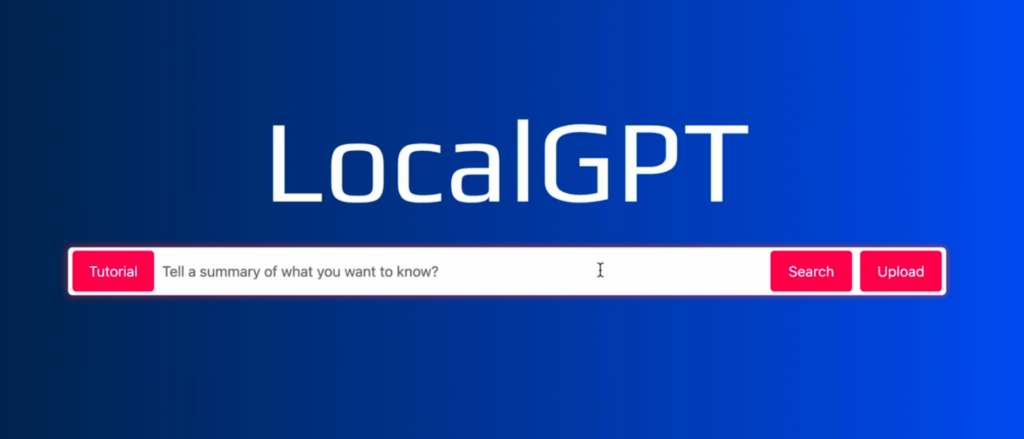
Now you have access to a user-friendly web-based interface for LocalGPT! Interact with your documents and ask questions effortlessly through the graphical interface.
With the GUI, you can seamlessly navigate through your ingested data and experience LocalGPT in a more visually intuitive manner. Enjoy exploring the capabilities of LocalGPT through the power of the graphical user interface!
Important Links:
LocalGPT Github Repository: https://github.com/PromtEngineer/localGPT
Leave a Reply